
Flare-On is a CTF challenge organized by Flare team of FireEye labs. There are a total of 12 challenges totally based on reverse engineering. Without further ado, lets get started on the write ups of challenges which I was able to solve.
1. MinesweeperChampionshipRegistration
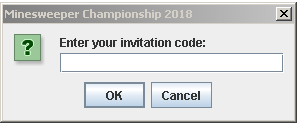
The first challenge was a jar file. Upon double clicking it brings up a registration box which asks for a validation code. On wrong entry, error message.
Lets open this file in a java decompiler “JD-GUI”. This utility displays java source codes of .class files. We can see that there is a inviteValidator.class file is present which has the following content
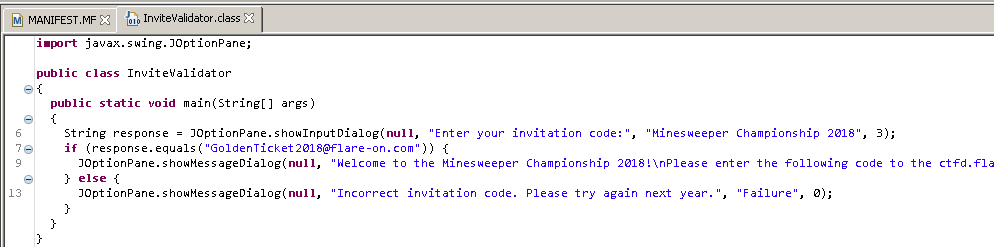
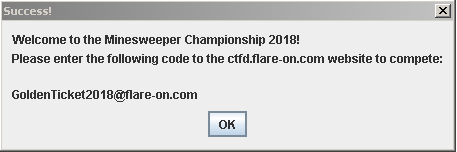
In the main function, it is comparing the input with a string “GoldenTicket2018@flare-on.com”. So, this is our flag for this level. We can check by providing this as input to that validation box and the result is
2. UltimateMineSweeper
The second challenge was an exe file. Double clicking this file opens up the minesweeper game as follows.

We can see that this game has 900 (30*30) squares out of which 897 are filled with mines and 3 are safe. And the task is to reveal all the non-mine squares to win this round. Well, 3 out of 900, what are the chances…right! If any of the mine squares are revealed, failure message will appear like this:
So, lets start analyzing this sample. CFF Explorer has revealed that its a .NET compiled sample. There is one debugger which is perfect to use these kind of samples, dnSpy. You can download it from here. Start the dnSpy and open the file in it. On the left side of the main window of this debugger, assembly explorer is present. You can ahead and browse through this list. You will see that there is one program section present which contains the following Main() function:
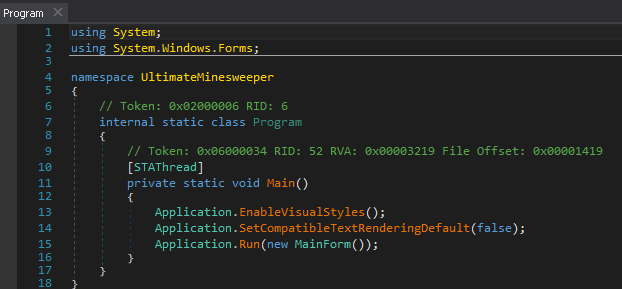
A MainForm() function is passed as an argument to the Application.Run() method. To navigate to this function, just left click and you will see the contents as follows:
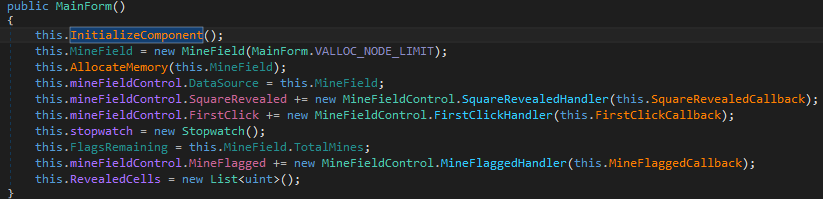
Looks like this function is initializing all the components of the game, initializing a variable MineField to VALLOC_NODE_LINIT (which is 30, will see shortly) which is basically the dimensions of the minesweeper game. And this is then passed to the function named AllocateMemory.
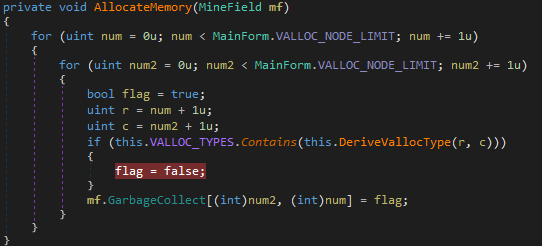
After analyzing this function we can deduce that this is the function that is setting which squares will have mines and which will not. There are two for loops, each will run 30 times and on the basis of a variable named flag’s value, it will set the squares to true (mine present) or false (mine not present). Also, we can deduce that num2 represents the column and num is rows (if counting of squares starts from 0).
There is an if loop inside this function which sets the value of flag to false, which is what we want, right! The iteration in which this if condition is met, we will get a pair of co-ordinates where flag is not present. This if condition is checking whether VALLOC_TYPES array contains the value retured by the DeriveVallocType function. Lets see what this is returning.

This function is returning the bitwise inversion (~) of the result of a mathematical calculation, i.e., (row*30 + column). Now, lets see the array with which this is compared to.
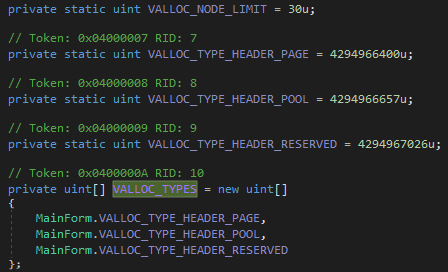
This array contains three constant variables, VALLOC_TYPE_HEADER_PAGE(4294966400u), VALLOC_TYPE_HEADER_POOL(4294966657u) and VALLOC_TYPE_HEADER_RESEARVED(4294967026u). The inversed output should be equal to these values in order to set a square with no mine. So, the output of that equation (without doing inverse) should be equal to the inversed values of these constants and those values are 895, 638 and 269. Lets do some mathematics now.
r * 30 + c = 895 => r = 29 and c = 25
r * 30 + c = 638 => r = 21 and c = 8
r * 30 + c = 269 => r = 8 and c = 29
So, we got our three rows and columns set. One other way we can do this is just put a breakpoint inside the if statement in the dnSpy and run the application by pressing F5. When it will breaks at your breakpoint, take a note of the variables(r and c) when that happens. It will look something like the following image. You have to do this thrice to get all the set.

Once you get the three values, open the game and reveal the specific squares and voila!! you will get the congratulations message along with the flag.

Flag is: Ch3aters_Alw4ys_W1n@flare-on.com
3. FLEGGO
Third problem was not “an” exe file, but 48 exe files! Double clicking any of them opens up the console which asks for some password. If we provide wrong password, it prints this

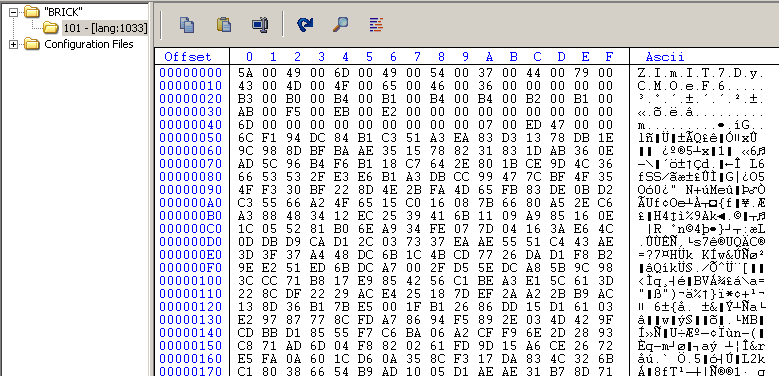
Loading the sample in CFF Explorer, shows that the sample has something in the resource section which is named as “BRICK” as shown.
Lets open the sample in IDA. In the main function, we can see that there is a call instruction at address 0x401320 (may be different for you), which IDA has commented as “Loading BRICK Resource”. This means that that function is used to load the resource section of the sample.

If you check that function, you will see APIs which are specific to resources like FindResourceW, LoadResource, SizeofResource etc. The data of resource section is being copied to the address 0x404380, which IDA has given a name “ResDestination”.
After loading the resource, it asks for a password and then at 0x401367, it calls the compare function. The output of this function is then compared to 0. If the output is 0, then that message ‘Go step on a brick’ is displayed which we saw earlier. This shows that the input is incorrect.
Inside the comparison function, we see that the input is first compared with a text “IronManSucks”. If we give password as this text, we get

Still no flag!
If the input doesn’t match with that text, it goes to another set of instructions as shown:
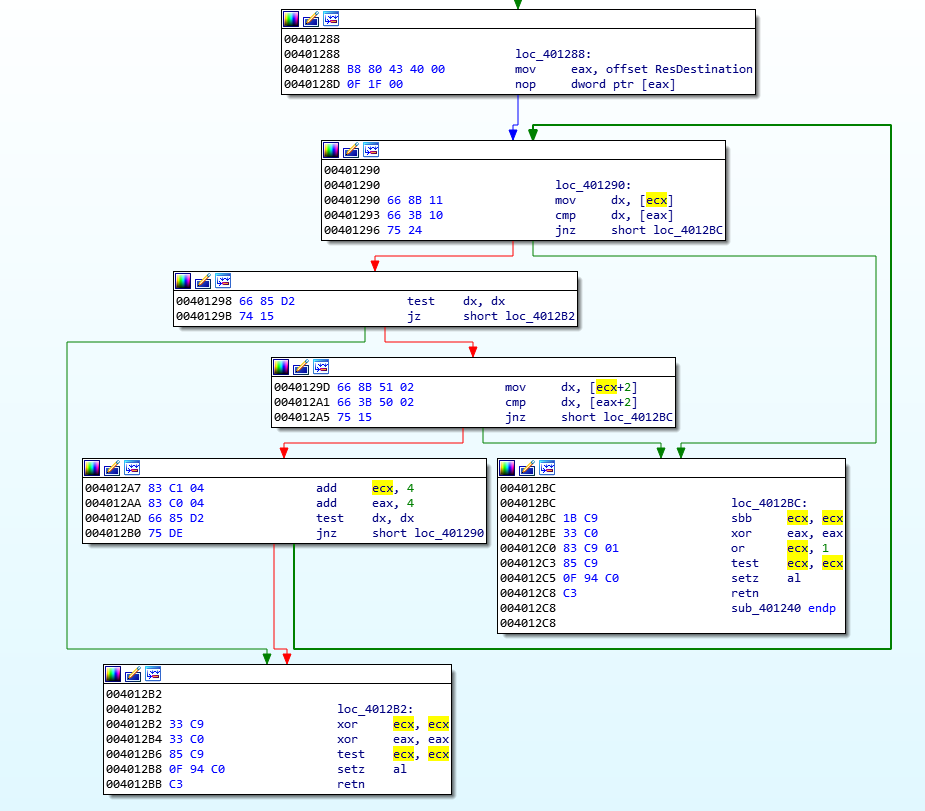
This is basically a comparison of input provided by the user with the initial bits of the resource section (see ResDestination that we encounterd earlier). So, this shows that the input/password that we have to provide has to be equal to the initial characters of the resource section.
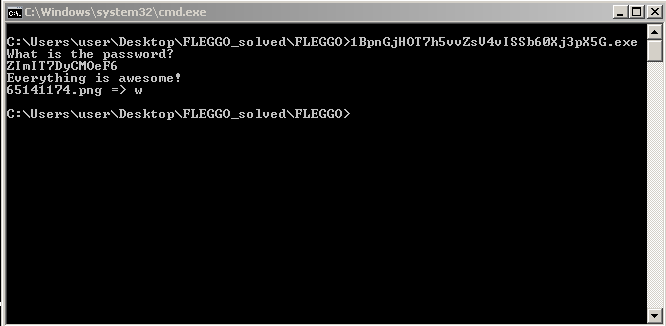
From the image of CFF Explorer showing resource section above, the value that password should be equal to is “ZImIT7DyCMOeF6” (for the sample I ran). After providing this password, a png file gets created whose name is printed in the console along with a character (“w” in my case).
Now, to get all the images and the associated characters, we have to check resource section of all the 48 files and provide that as the password. You can automate this whole process or you can do manually! After doing all that, we get a list of pairs like this:

which doesn’t make any sense right now but looks like flag which is jumbled up. Now, open any image and you will see that there is a number present in all the images (“7” for this case).
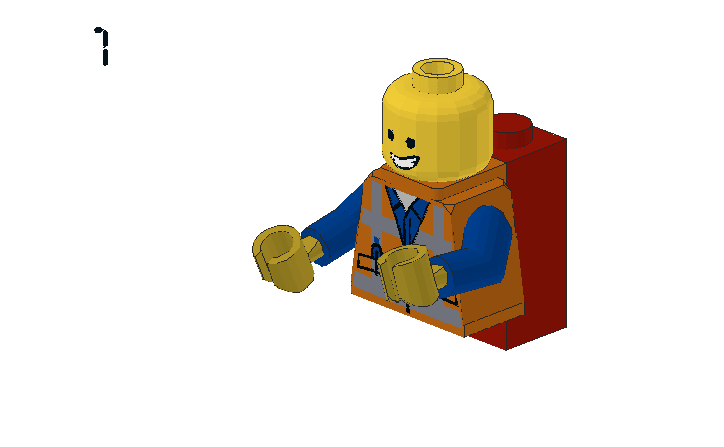
So, now we have the characters associated with an image and the corresponding place of that character. For example, “w” is the 7th character in the flag. Likewise map all the characters and we will get the flag!!
Flag is: mor3_awes0m3_th4n_an_awes0me_p0ssum@flare-on.com
Note: more to come….